Don’t have an SSL certificate? Google plans to penalize sites without SSL starting this July.
If your site has text inputs like contact forms, search bars, etc. and it’s not on HTTPS, it’ll be labeled as ‘Not Secure’.
In this tutorial I’ll show you how I’ve got a free certificate and installed it using cPanel.
Important: check that your cPanel has enabled the feature SSL/TLS in the Security section.
Step 1: Get a Free SSL Certificate
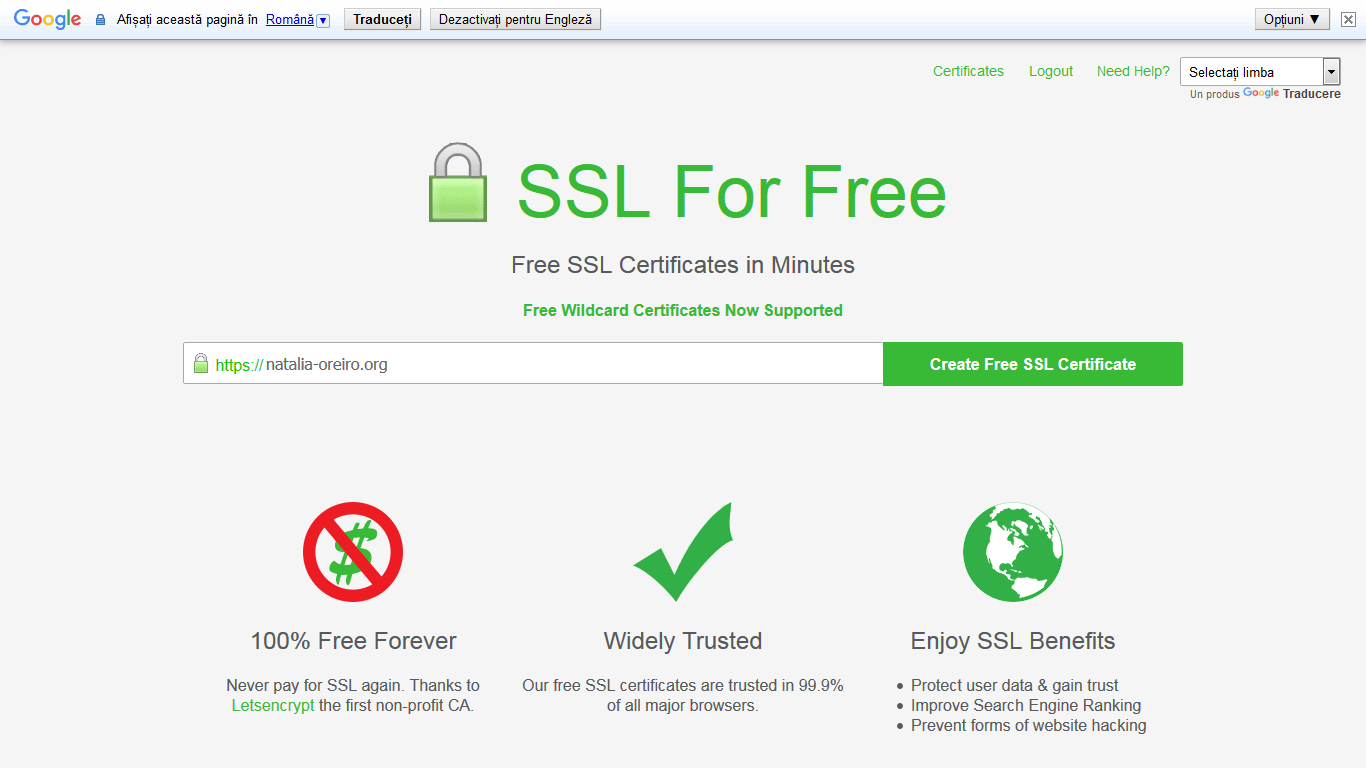
I’m using a free certificate I got from the site SSL For Free.
Simply add your URL in the input field and click the Create Free SSL Certificate button. The site will create a certificate for both yourdomain.com and www.yourdomain.com.
Step 2: Validate Your SSL Certificate
SSL For Free needs to validate your SSL new certificate. To achieve this, it provides you with three options to choose from:
- Automatic FTP Verification (I used this one)
- Manual Verification
- Manual Verification (DNS)

Follow the instructions for the option you choose.


If you select the Automatic FTP Verification, add you FTP info, then click the Download Free SSL Certificate button. On your FTP you’ll see a new folder .well-known. Don’t delete this folder, it has been created by SSL For Free.
If all goes well, the certificate files should appear like this:

Keep the browser tab with the certificate files open, or copy the 3 fields on your computer.
Step 3: Add your SSL Certificate to cPanel
Go to your cPanel → Security → SSL/TLS.

Under Install and Manage SSL for your site (HTTPS) → click the Manage SSL sites link.
Under Install an SSL Website → select your domain and add the data from the 3 fields from SSL For Free → click the Install Certificate button.

This is how it will look when to enter the Manage SSL sites page again:

Step 4: Configure Your SSL Certificate
After the certificate has been installed, your site can be accessed at the URL https://yourdomain.com. In order to redirect all traffic to HTTPS I’m using the free plugin Really Simple SSL.
Simply install and activate the plugin and it’ll automatically detect your certificate. It’ll display a new alert at the top of your WP Dashboard → click the Go ahead, activate SSL! button.
 Screencapture via Really Simple SSL
After activating SSL, since your site’s URL has changed, you’ll have to login again in WordPress. Simply use your login info like usual.
Step 5: Secure your Coppermine gallery
First, you need to log into your gallery → go to Config → change the URL from http:// to https://
Lastly, go to your root directory (public_html usually) → open to edit the file .htaccess → add this code at the top, before the WordPress part:
<IfModule mod_rewrite.c>

RewriteEngine on

RewriteCond %{HTTPS} !=on [NC]

RewriteRule ^(.*)$ https://%{HTTP_HOST}%{REQUEST_URI} [R=301,L]

</IfModule>
Let me know below if you have any questions or concerns.
WOW, It’s amazing tutorial about free SSL. Basically, I’m familiar with sslforfree.com, I was looking for some info on your website, and got this tutorial article. Anyway,Thanks for the article Monica.
Great tut, the SSL site has changed a little but still easy to follow.
i just couldn’t find the .htaccess file at the end so had to leave that but seems to work ok i think!
thanks so much!
i found it, had to unhide it lol